Request for Information (RFI) Feature
In Openings Studio, we have a feature called Request for Information or RFI. There is a column in our Door & Frame Schedule, as well as table for reviewing all the RFIs in the project.
This is a great place to leave messages and questions for collaboration with the specification writer, architect, owner, or anyone else who has access to the project.
How to use the Door & Frame Schedule RFI column
(Click here to jump to the table section)
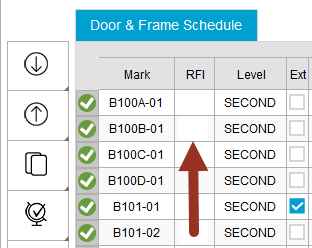
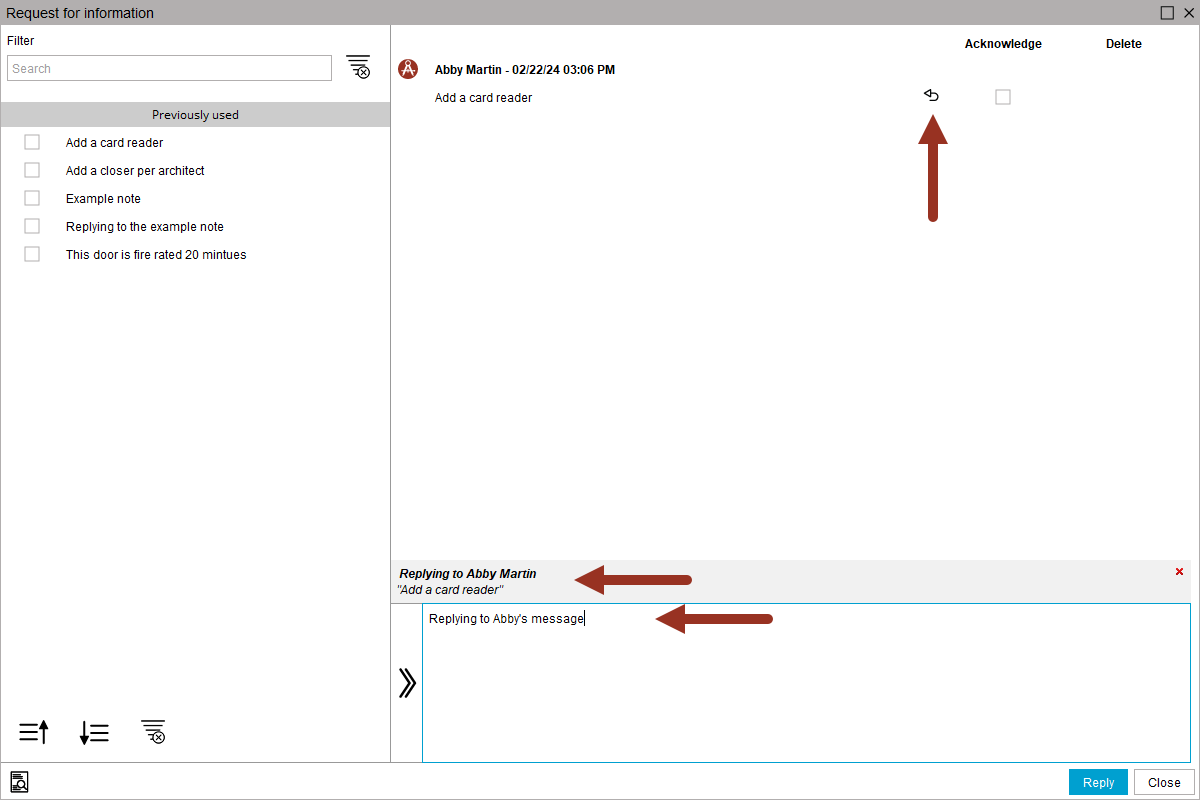
1. To create an RFI, find the opening Mark number and click in the RFI column on that line.
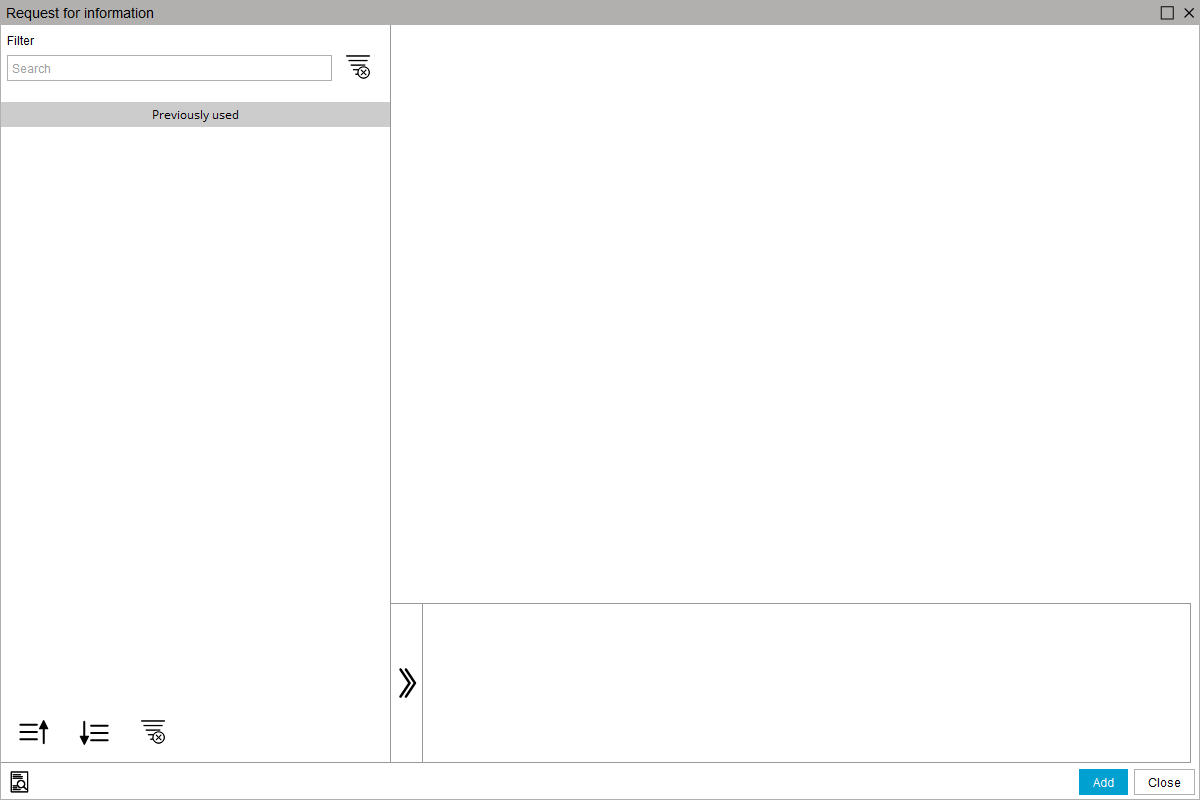
A window will open that looks like this:
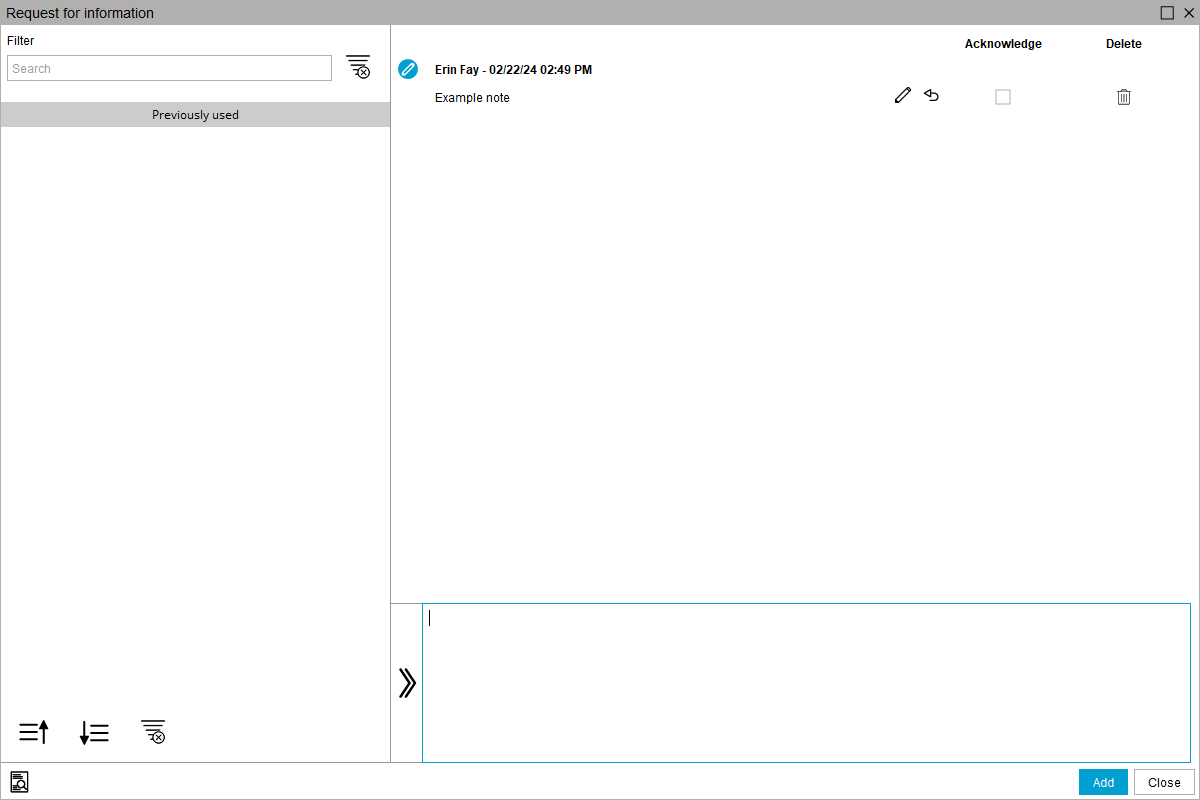
2. You can type in the text box at the bottom the screen and when done, either press Enter on your keyboard, or click Add. Your note will appear with your name on the screen.
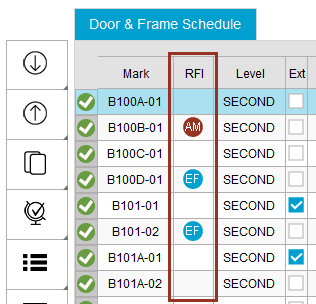
3. Once you are finished, you can click Close. Your new RFI will be indicated with your initials on that line. Colors also correspond to the user type.
- Light Blue - Specification Writer
- Dark Red - Architect
- Dark Blue - Contractor
- Orange - Owner
- Dark Gray - Distributor
- Yellow - Security Consultant
Note: If you have legacy RFIs from prior to the March 2024 release, you may still see the symbols we used before changing to the initials of users.
4. If you make a mistake, you can edit or delete what you have written. Click on the iThis you entered previously and you will have the option to edit with the pencil, or delete the note with the trashcan.

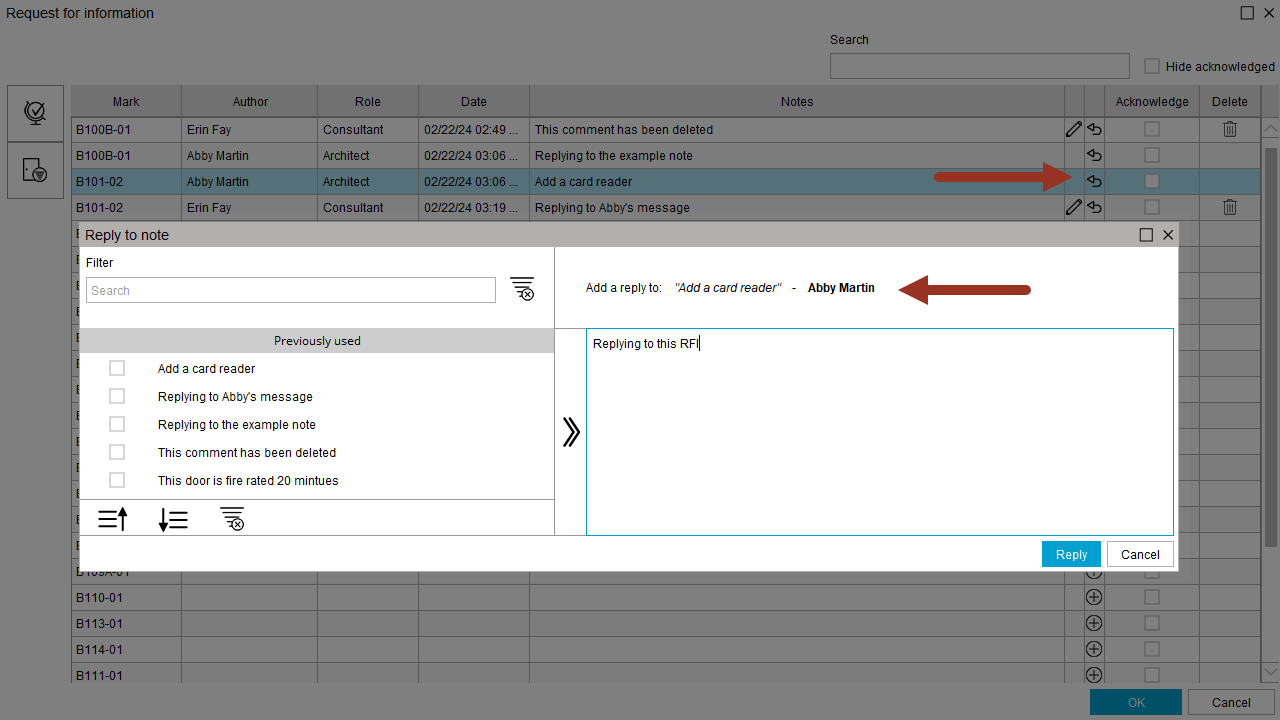
5. There are also options to reply directly to messages.
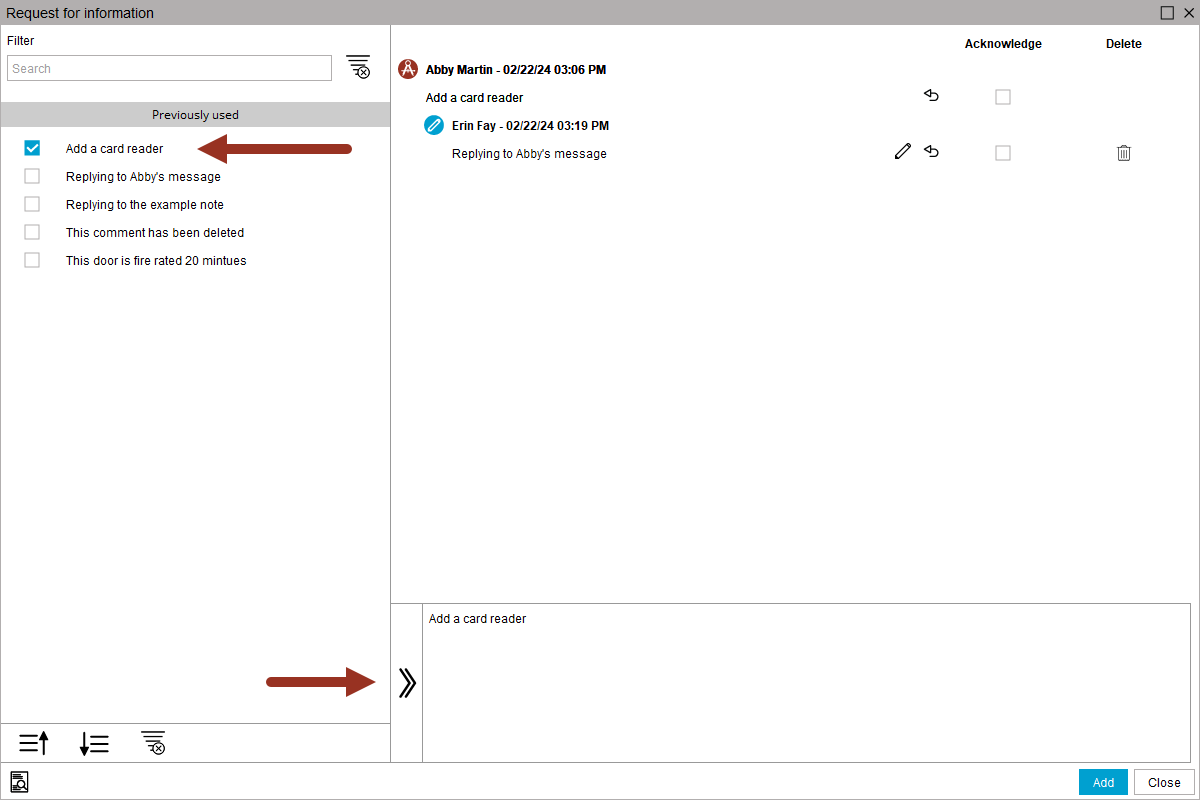
6. Finally, all the notes you have used in the project will appear on the left side of the screen. If you want to re-use a note, you can select it and then add it to the text box. Press Enter on your keyboard or Add to save the message.
How to use the RFI table
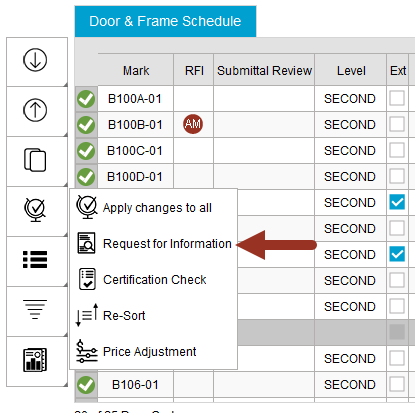
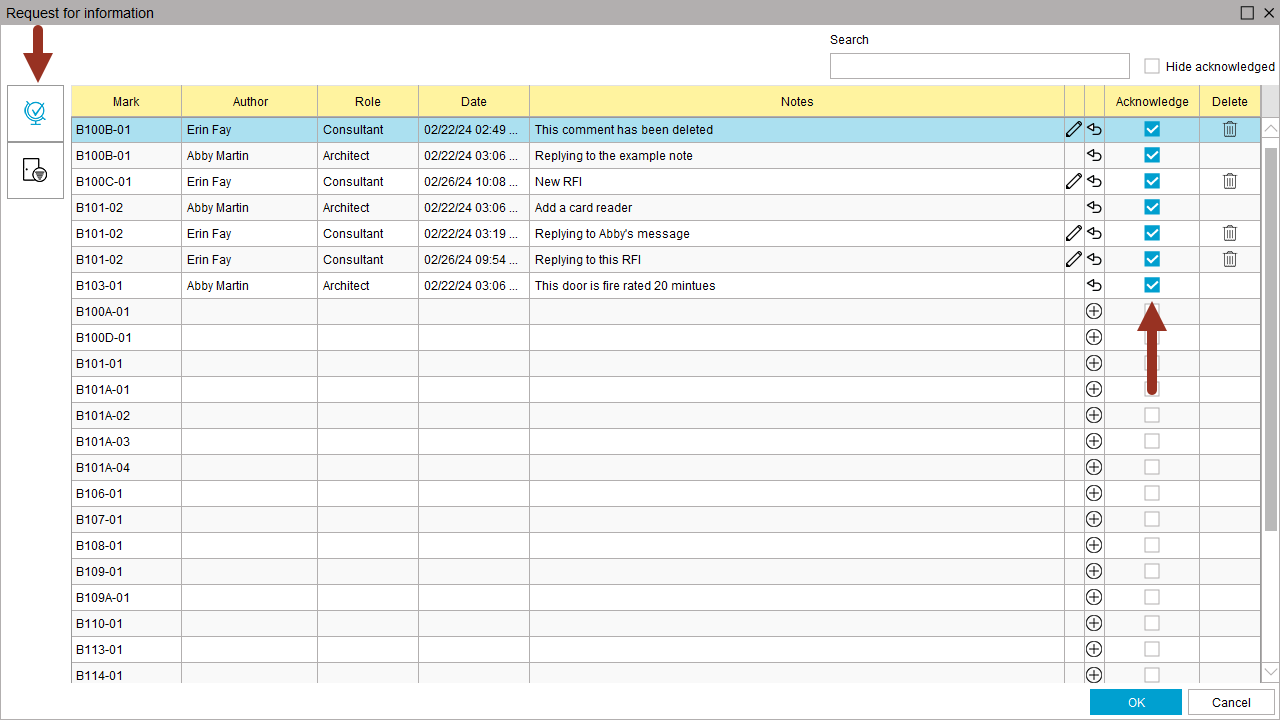
1. Under the Apply changes to all button, you will also find Request for Information. Click this to open the table view.
2. A table view of all the openings in the project will open. All the openings with RFIs will appear at the top of the screen.
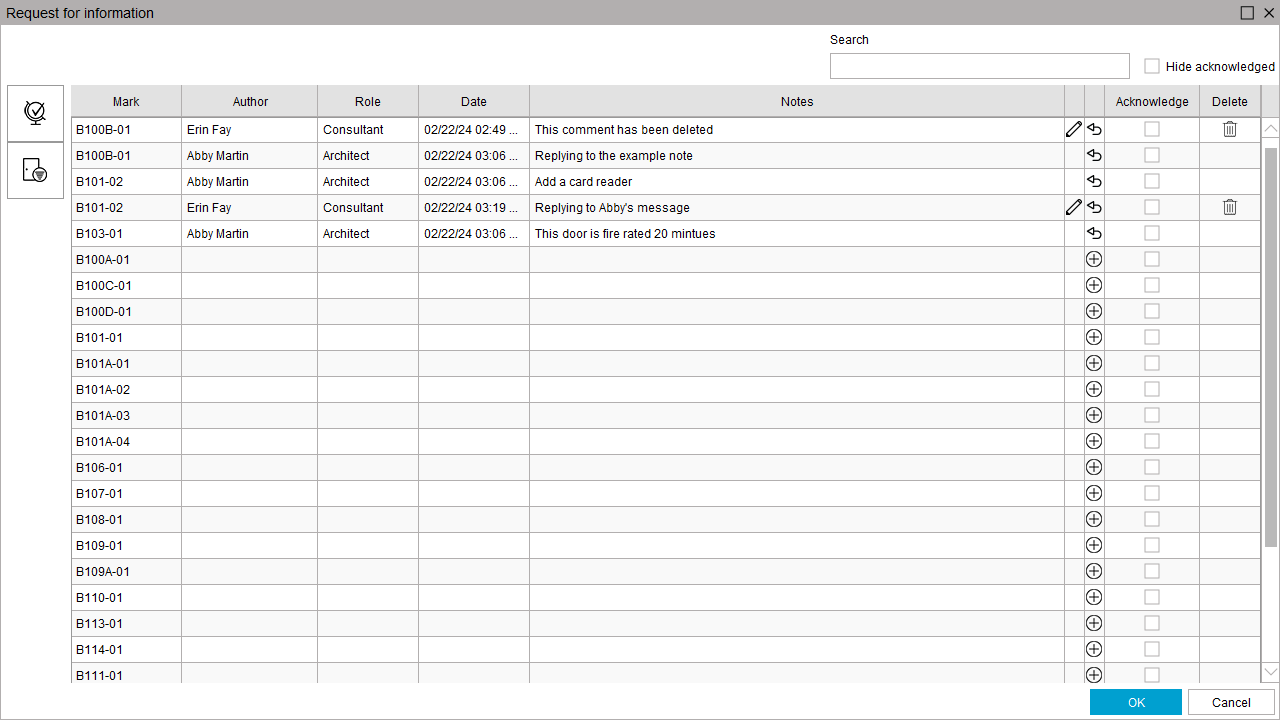
3. You can use the Search box in the upper right-hand corner to filter down the results.
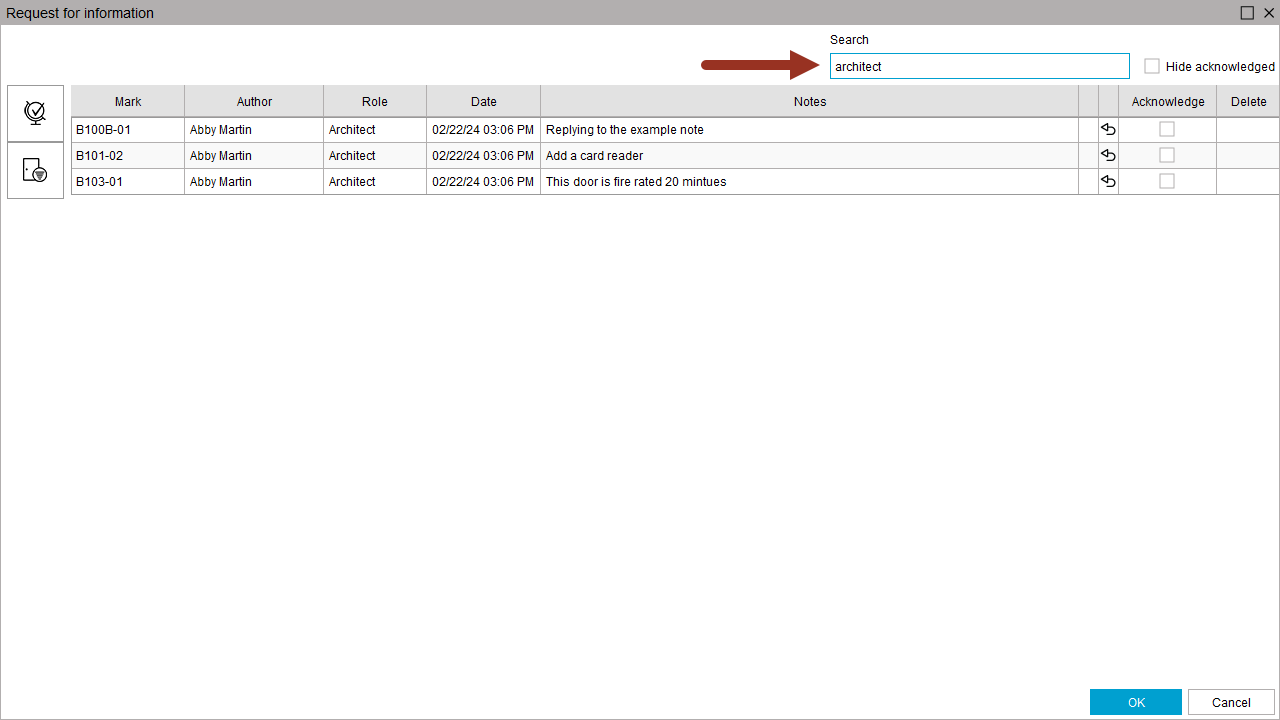
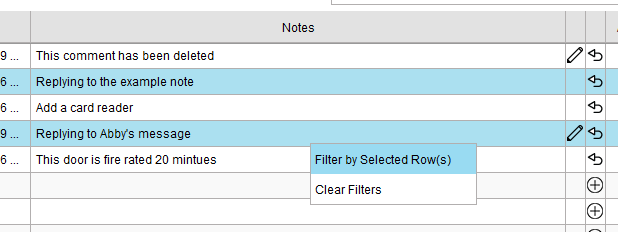
There is also the option the hold down CTRL, select individuals lines, and right click to Filter by Selected Row(s).
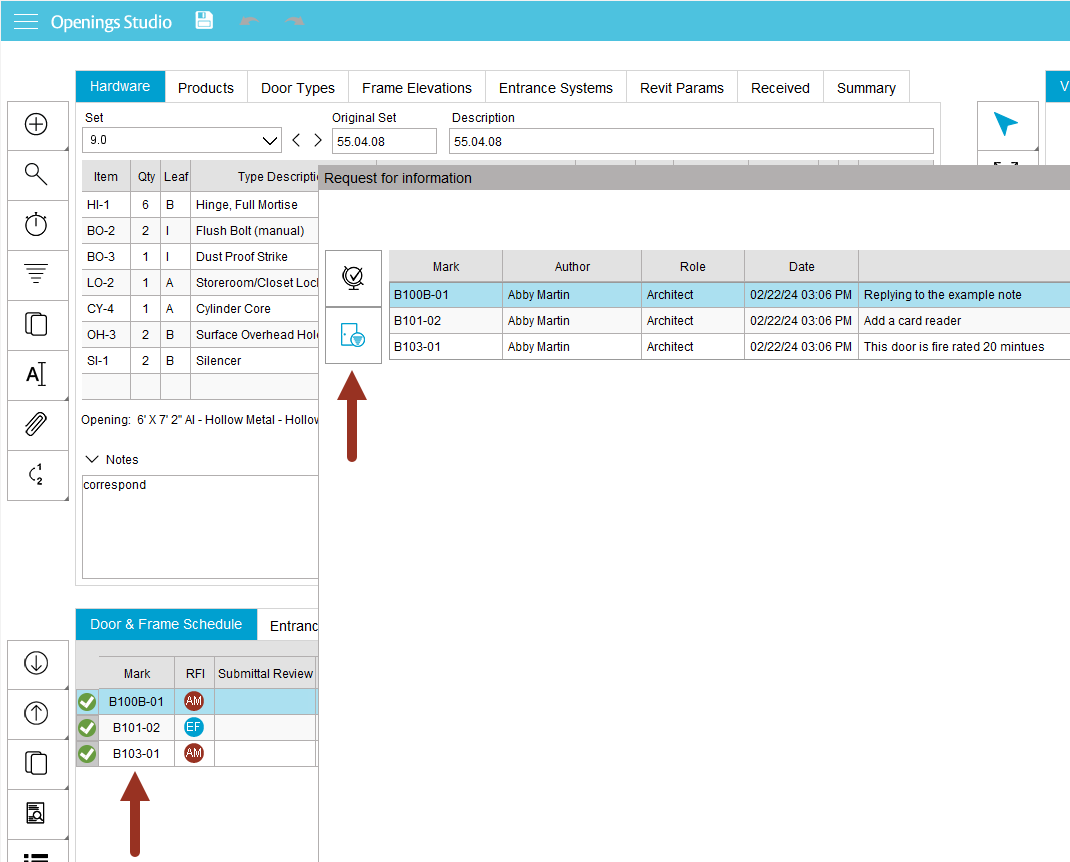
4. If you want to filter the Door & Frame Schedule by the RFIs you have filtered, you can do this as well using the icon on the left. This may be most useful if you have multiple monitors.
5. To add a new RFI from the table, click the + sign on the right side of the screen. The previously used notes where will appear here as well.
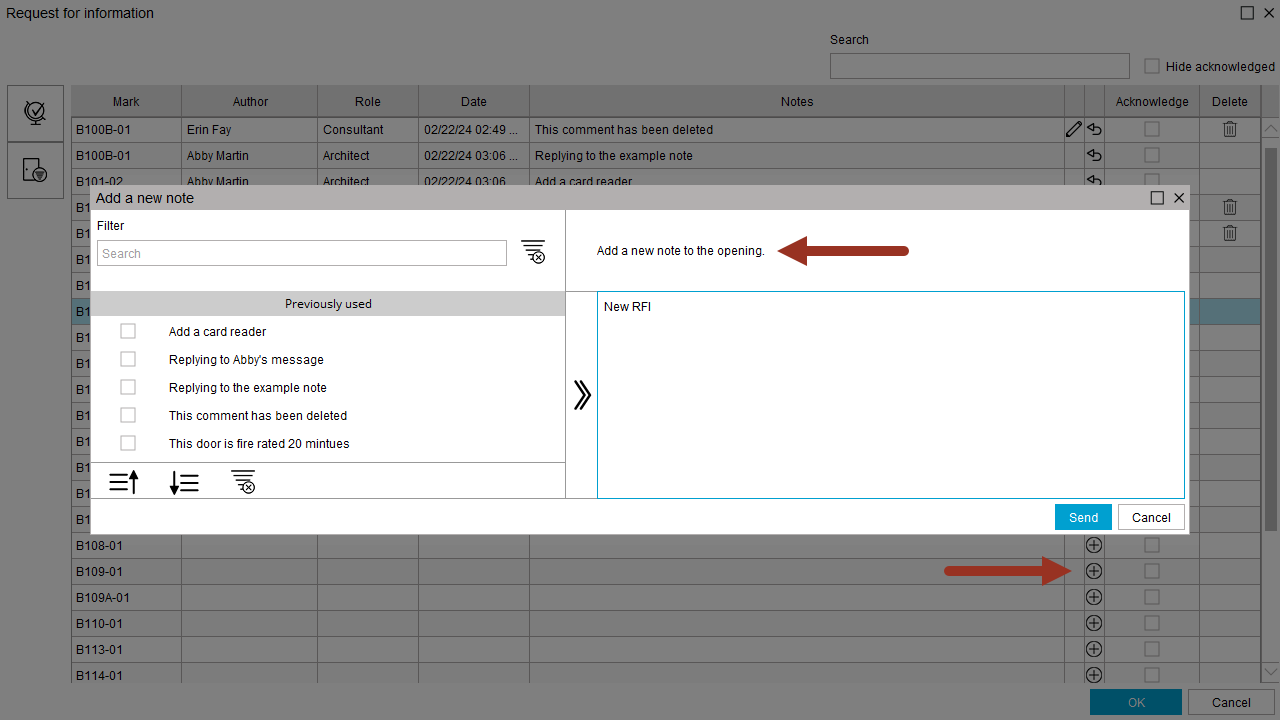
Or you can reply to existing RFIs using the turn around arrow.
6. You can also use the Apply changes to all to quickly make mass changes. In this example, we used it to acknowledge all the open RFIs.
Related Links
