
Steps to analyze
1. Open your project in Revit
Open your project in Revit
You can skip to step 5 if you are already familiar with the login and setup process.
2. Confirm your model is ready
If this is your first time uploading this project, review our checklist to prepare your model: Get started - Analyze project checklist.
3. Launch Analyze
In the Revit ribbon:
- Select the Openings Studio tab
- Click Analyze

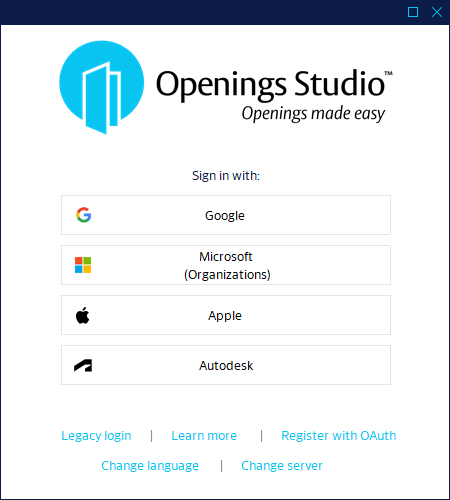
4. Login and Setup
4a: Logging in
Openings Studio will:
- Launch
- Check for updates
- Prompt you to log in
If needed:
- Register for an account.
- Learn more about log in options
Note: You may be prompted to update the plugin. This is usually optional and can be skipped unless you’re ready to restart Revit.
Go here to learn about updating your plugin, if needed.

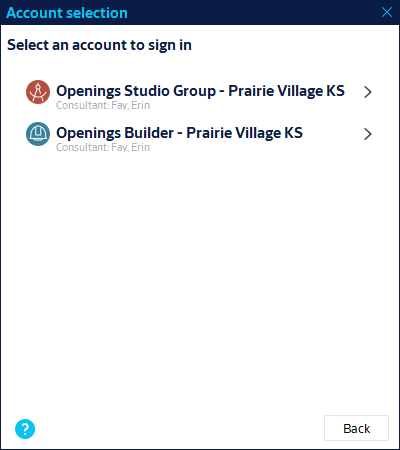
4b. Select account (if applicable)
If your email is linked to multiple accounts, choose the correct one:
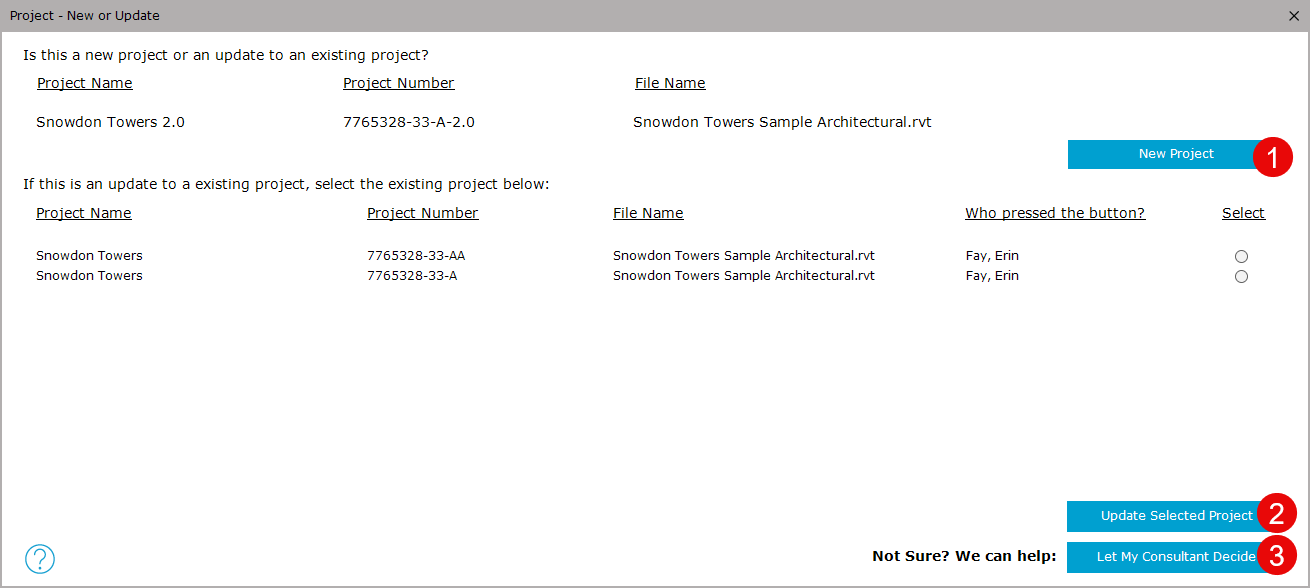
5. Project identification (sometimes not applicable)
This screen may not appear. If it doesn’t, continue to Step 6.
Openings Studio uses the following to identify your project:
- Project Name
- Project Number
- File Name
If any of these things are found, you can choose new project (1) or update an existing project (2).
You also select Let My Consultant Decide (3) if you are unsure:
6. Navigate the Analyze wizard
The Analyze wizard will open. You will use the Next button to move through each tab.
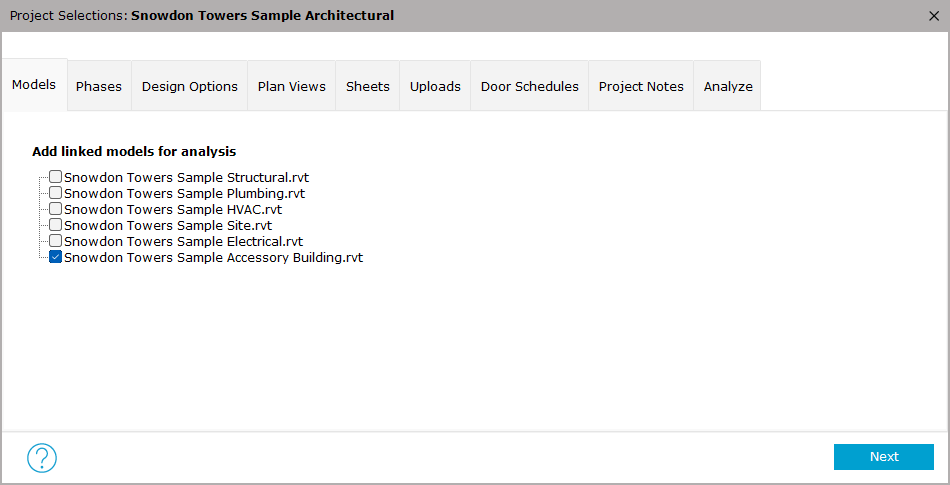
7. Models
This tab shows any models that are linked to the open file.
- Select models that include relevant doors
- You can skip this tab if you do not have any linked models with doors
Click Next to continue.
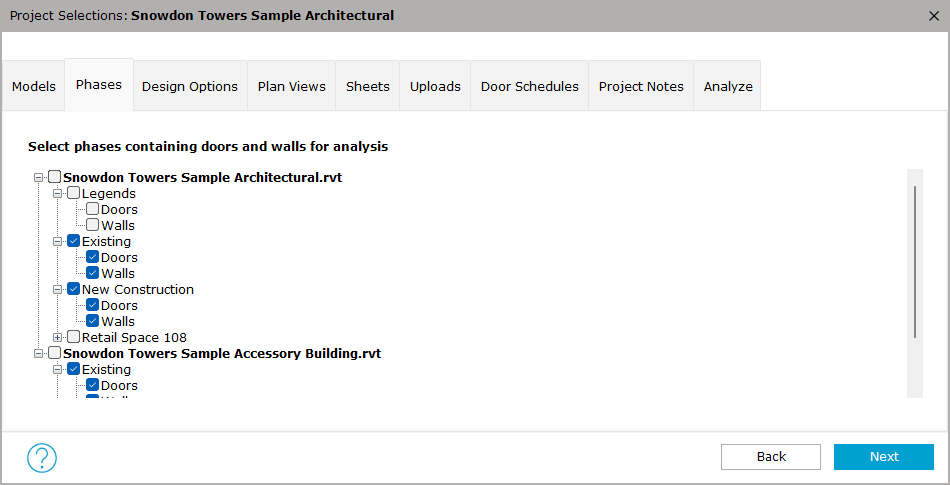
8. Phases (important)
This is the most critical step.
- Select all phases that include doors relevant to the specification process
- This is required for each model, so scroll down if needed
- Include wall phases as well for better results
Best practices:
- Do not remove phases in future analyzes
- When unsure, select more rather than less
Helpful Hint!
- Select Existing Walls if there are new doors located in existing walls.
Click Next to continue.
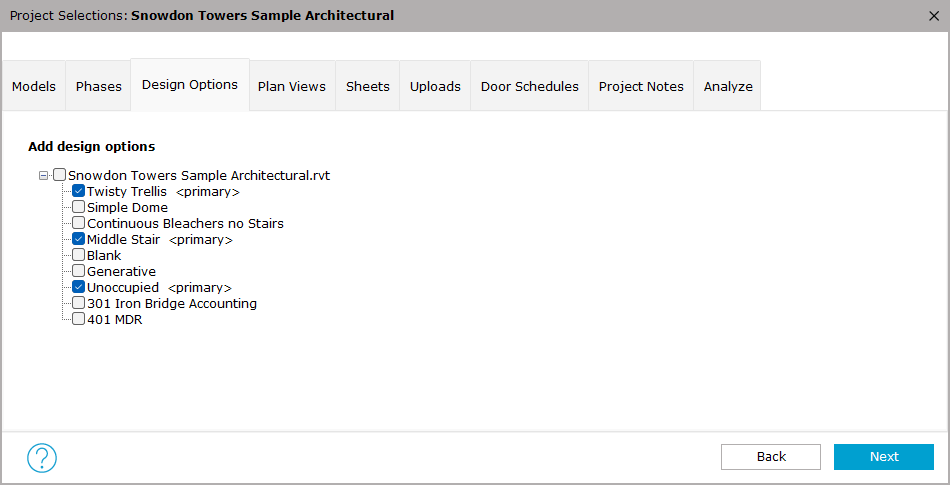
9. Design Options (optional)
- Select any design options that include relevant doors
- The Primary option is selected by default and can be left as-is, even if no doors are present.
If unsure, you can skip this tab.
Click Next to continue or skip.
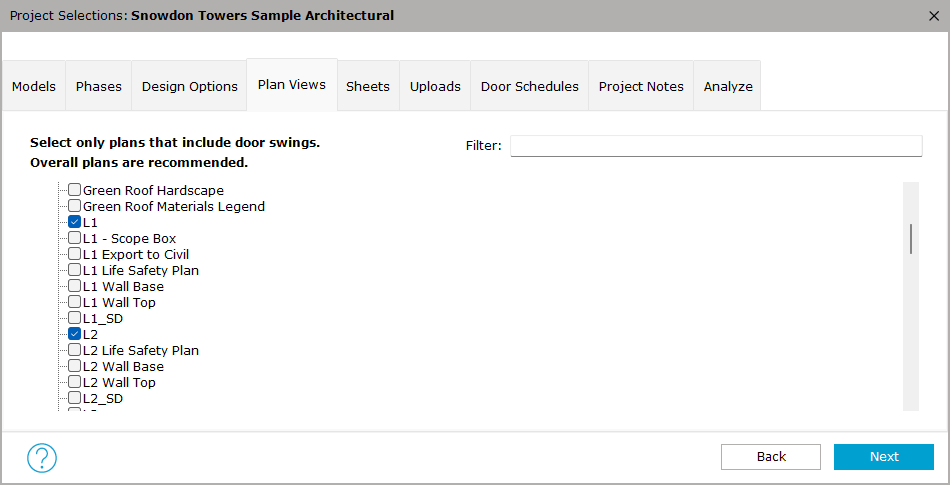
10. Plan Views (optional)
Used to capture door swing lines.
We recommend:
- Selecting overall plan views, even if door numbers are not shown
- Using the filter to find plans quicker
Click Next to continue.
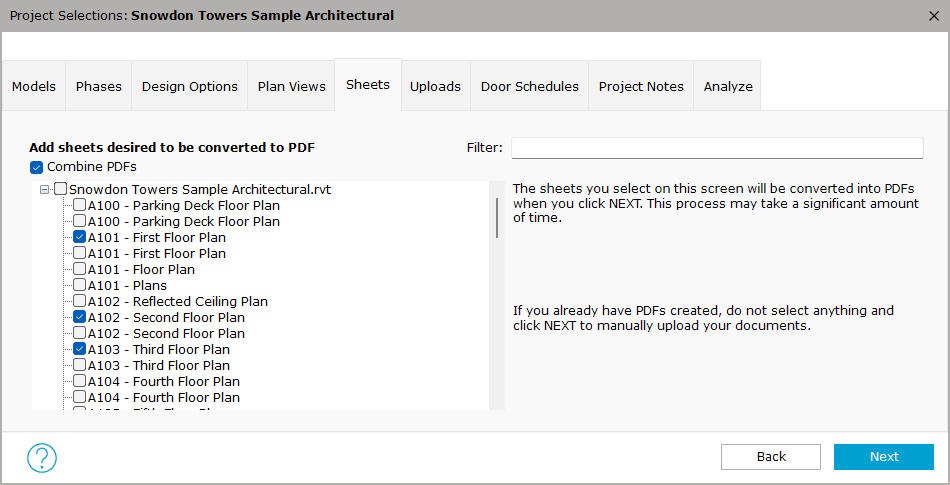
11. Sheets (optional)
- Select sheets to generate PDFs for the Analyze
- This process may take a while if your project is large
- You can attach already created PDFs on the next tab too, or email them later
Note: Available in Revit 2022 and up.
Click Next to continue.
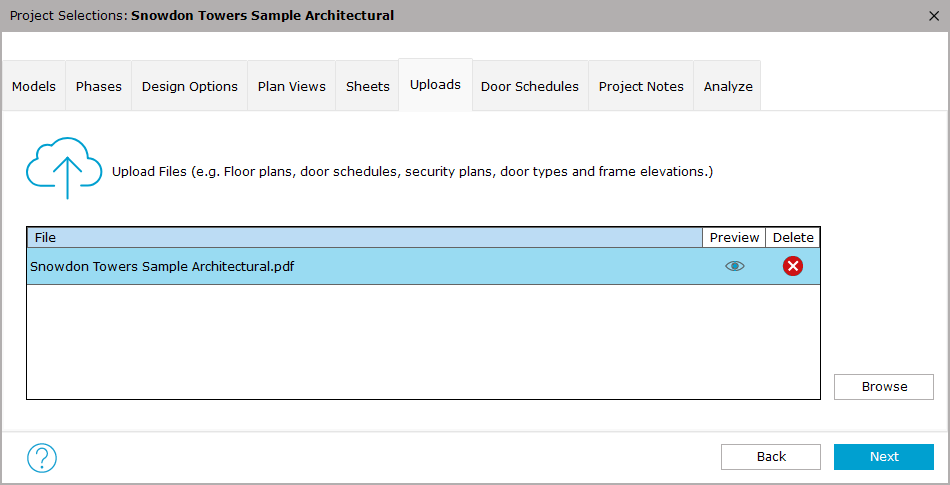
12. Uploads (optional, but recommended)
- Review sheets generated from the previous step
- Click Browse to add additional PDFs from your computer
Click Next to continue.
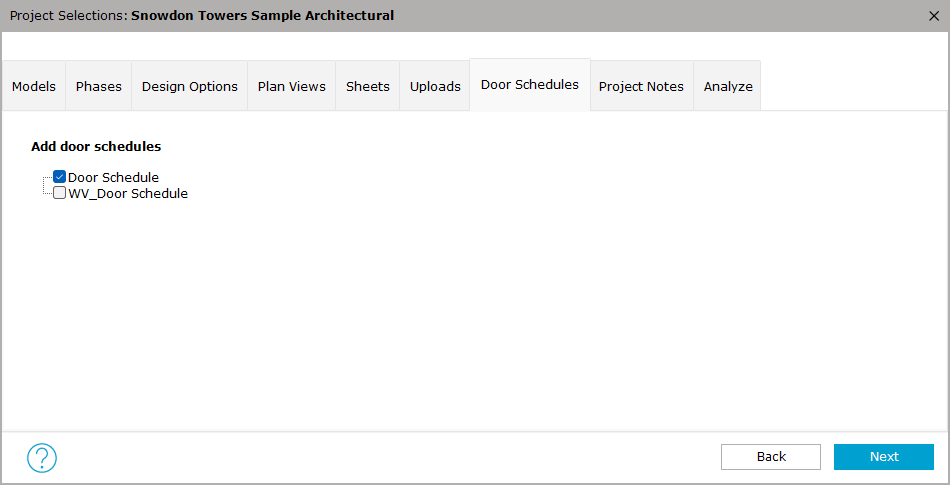
13. Door Schedules (recommended)
- Select any relevant door schedules.
Click Next to continue.
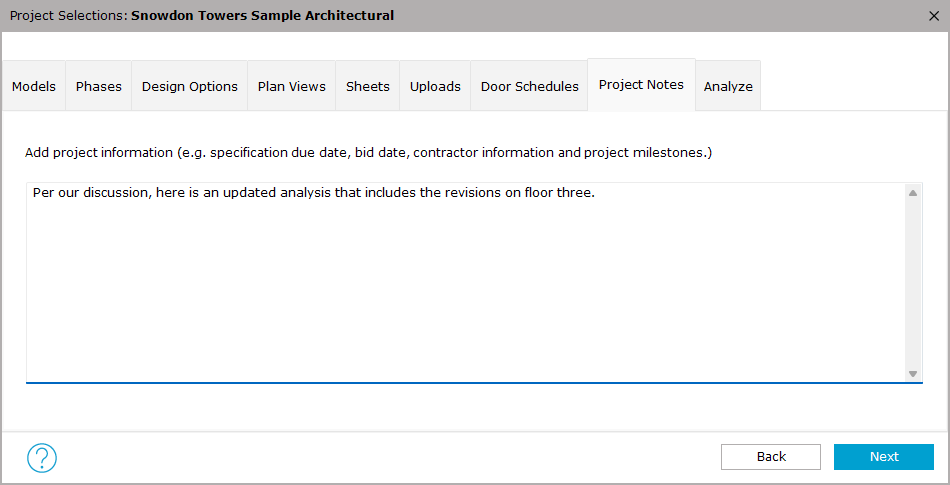
14. Project Notes (optional)
- Include messages to your consultant here
Click Next to continue.
15. Run Analyze
15a. Start the process
- Click the Analyze button to begin the process.
- Revit will be unresponsive during this process.

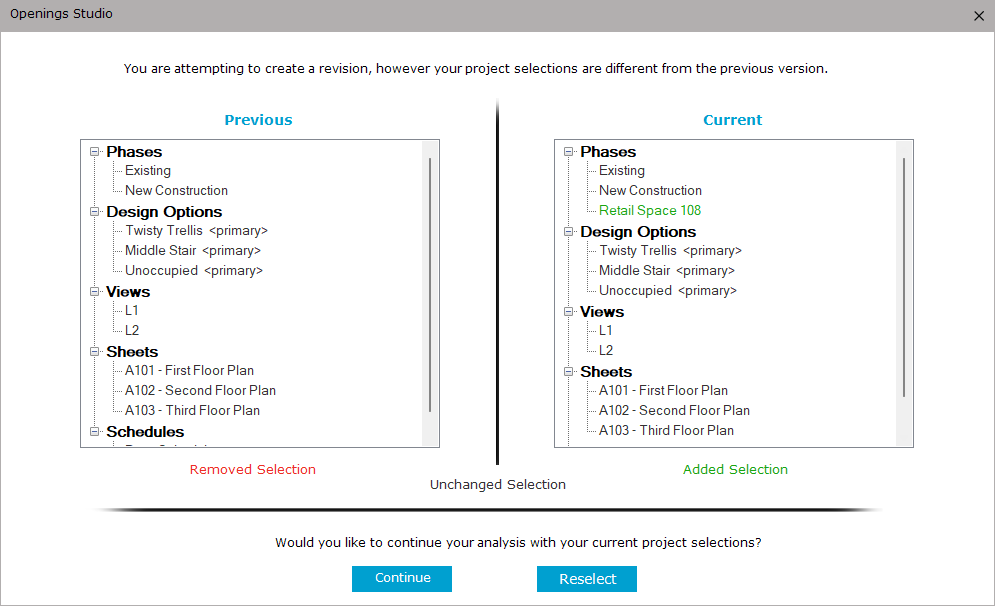
15b. Confirm Changes (revisions only)
If selections have changed from a previous analyze:
- Review Changes
- Click Continue
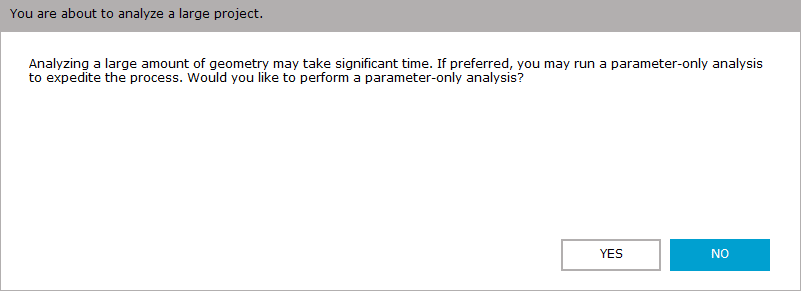
15c. Large File Option If your file exceeds 300MB:
- You may see an option for a parameter-only analyze
Recommendation:
- Try the full-analyze first (select no)
- Use parameter-only if performance is slow (select yes)
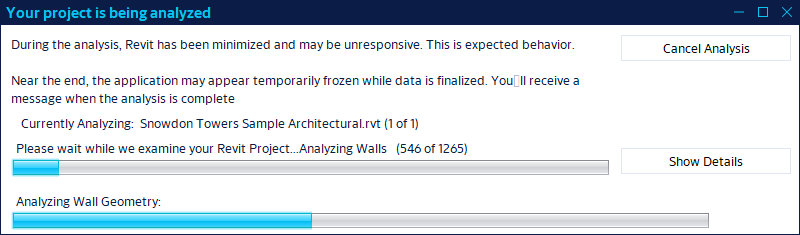
16. Processing
- The analyze process will run
- Duration depends on project size
Important note:
If the process:
- Runs longer than 1 hour, or
- The analyzing progress bar appears stuck for longer than 5-10 minutes
Cancel the process and contact support. They can help investigate and offer alternative solutions.
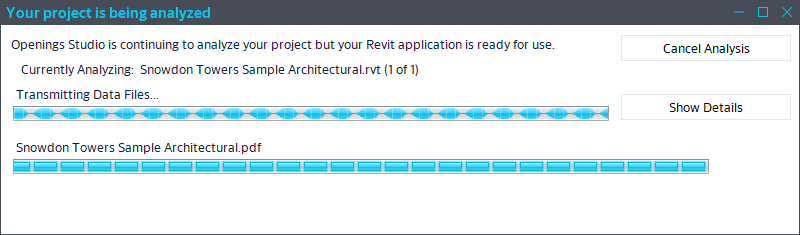
However, the transmission phase can appear frozen for a few minutes, but this part is normal:
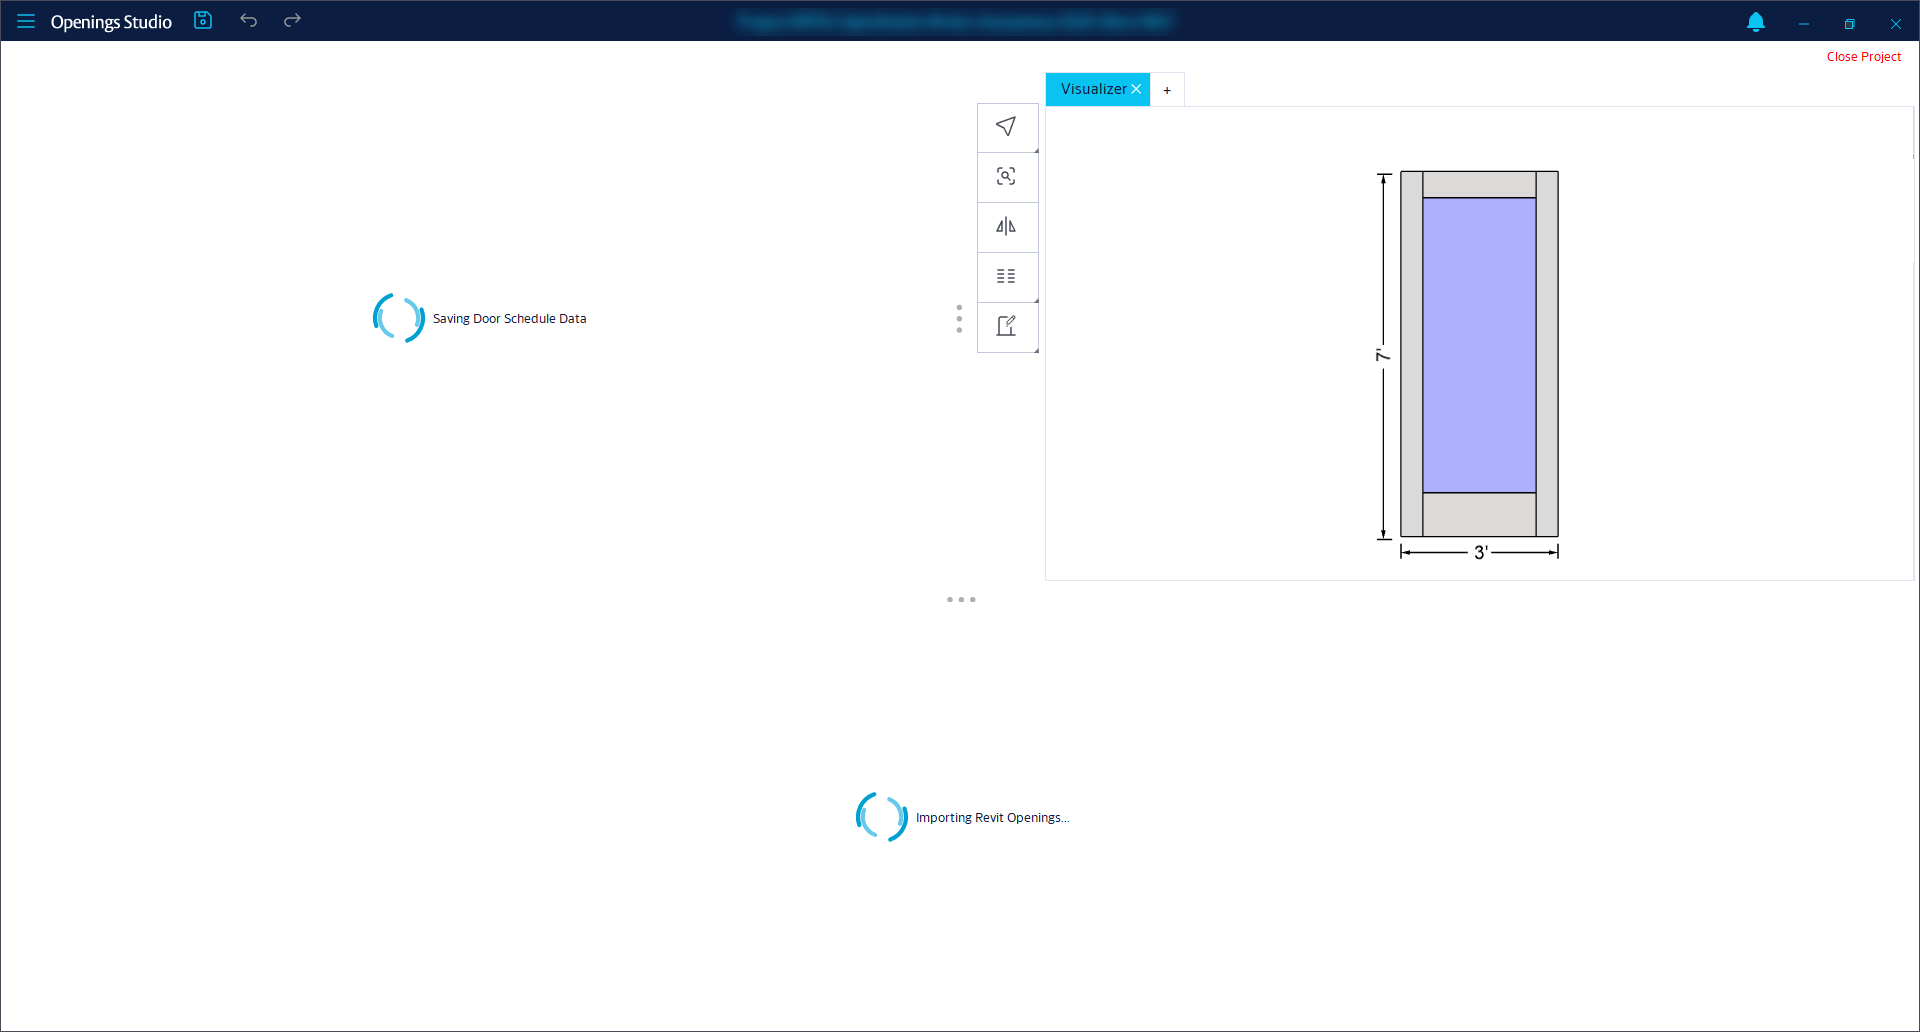
17. Final load and completion
Near the end of the analyze:
-
Openings Studio will open automatically and finish loading the project
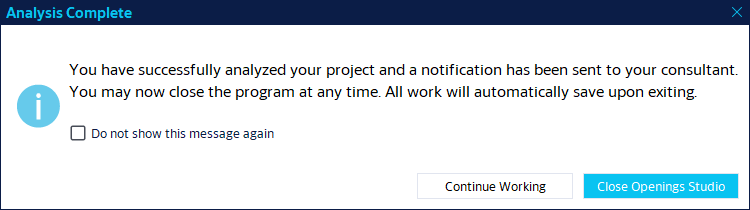
When the analyze is complete:
-
A confirmation email will be sent to you and your assigned consultant
-
You will receive a message:
-
Close Openings Studio and everything saves automatically
-
Continue working and check out the results
-
Note: Your consultant will not be able to work in the project while you are in it.
-
-
Related Links
Get started - Analyze project checklist