
Overview
Use Hardware Assessment to document products that need to be added, removed, repaired, or replaced at a specific door. Hardware Assessment is tracked at the door level, which allows you to document different changes for individual doors, even when multiple doors use the same hardware set.
Before you begin
- Open the project that contains the door you want to assess.
- Confirm the correct door is selected in the Door & Frame Schedule.
- Have site notes, photographs, or other assessment information available.
Steps
1. Select a door
In the Door & Frame Schedule, select the door you want to assess.
The assessment is saved for the selected door only.
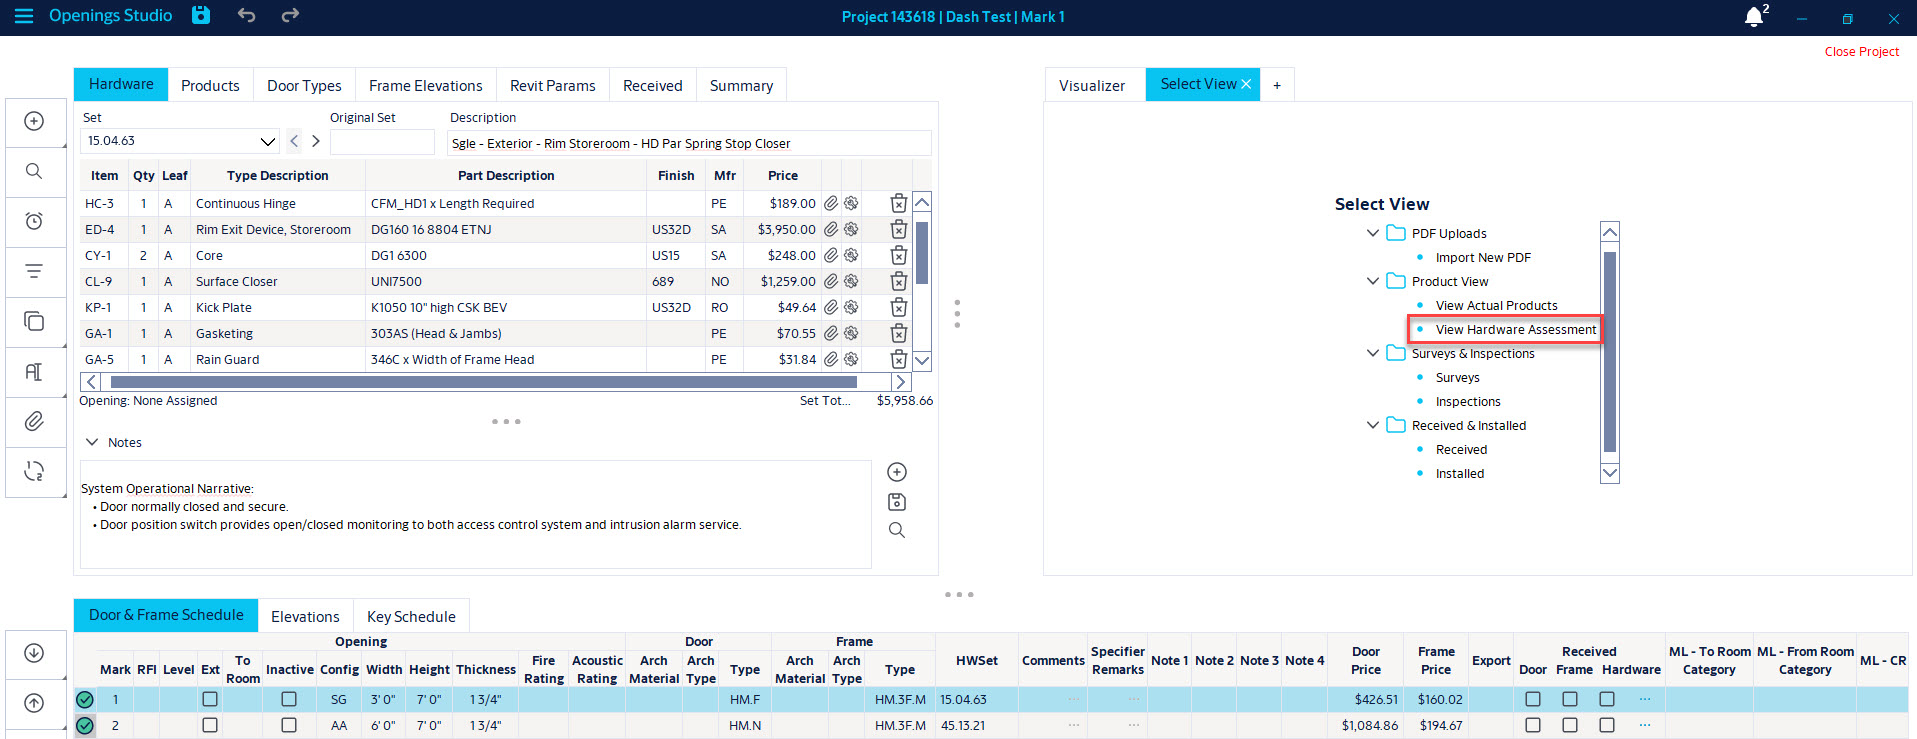
2. Open Hardware Assessment
- Open the Visualizer.
- Select the Plus (+) menu.
- Locate the option below the certification details.
- Select Hardware Assessment.
3. Review the hardware
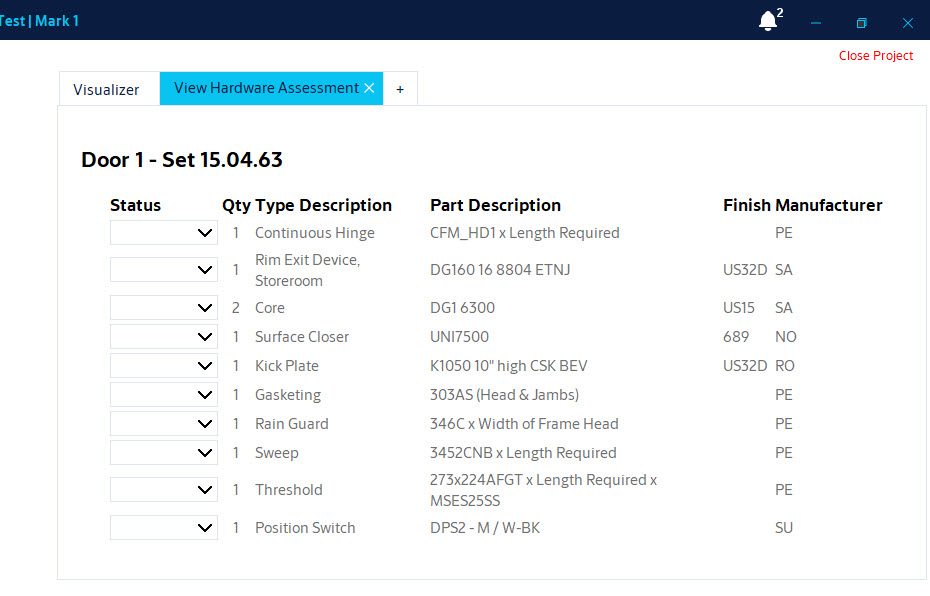
- Verify the door mark matches the door you selected.
- Verify the hardware set matches the selected door.
- Review the listed products before assigning an assessment action.
4. Assign an assessment action
Use the Status menu to document the required action for each product.
| Action | Use when |
|---|---|
| Add | A required product is missing and needs to be added. |
| Remove | An existing product should be removed. |
| Repair | An existing product can remain but requires repair or corrective work. |
| Replace | An existing product must be replaced. |
| Existing | An existing product requires no change. |
5. Review the assessment
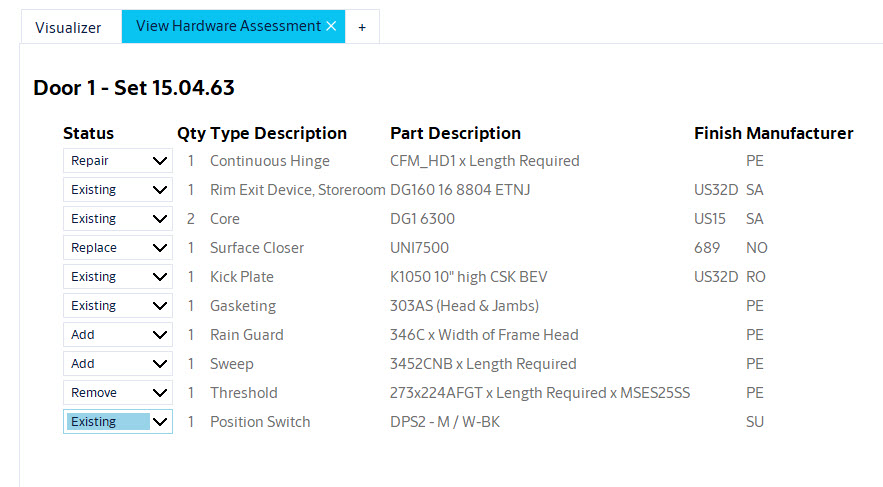
Confirm the correct assessment action has been assigned to each product.
Result
The selected door now contains a Hardware Assessment that documents products that should be added, removed, repaired, or replaced.